Dipping into the world of candle-making is like opening a door to endless creativity. And guess what? It’s a lot simpler than you think.
It’s a bit like cooking a recipe you've fine-tuned over the years—blending together elements of art and science until you've got a beautiful, functional masterpiece. The best part? It’s not just about having a candle. It’s about having your candle, with its unique story to tell – be it of festive celebrations, cosy nights, or maybe the seed of a cool business idea.
Now, imagine wrapping up a long day and lighting a homemade candle that you've created. There's just something deeply satisfying about watching it burn and knowing that every decision—from the wax type to the fragrance blend—was all you. And hey, if you get really good at it (which you totally can), who's to say you can't turn this passion into a side hustle or business venture? There's a big world out there that loves a unique, quality candle.
For many of us, crafting can be a therapeutic escape. And candle-making is right up there. Choosing waxes, mixing fragrances, and watching your creation come alive can be such a joy. Plus, there's this cool buzz around unique, handmade candles these days. So not only do you get to enjoy your work, but you might just find others wanting a piece of it too.
If you're sitting there thinking, "Sounds great, but where do I start?"—don’t fret. We're here to illuminate the pathway of your candle-making journey. Our guide is here to make sure you dive into this craft headfirst, armed with all the info and confidence you need.
Step 1: Choose Your Wax
Deciding on the right wax for candles is more than just about melting and setting—it's about understanding the ambience you wish to create. At NI Candle Supplies, we offer a trio of waxes: soy, paraffin, and a coconut/rapeseed blend—each of which carries unique characteristics that define its burning time, scent throw and even environmental impact.
Some people have a soft spot for the creaminess of soy, while others appreciate the longevity of paraffin. For those wondering about the best wax for candles, especially beginners, soy wax is a commendable choice for its ease of use and eco-friendly nature. Plus, it blends beautifully with fragrance oils for candles, creating a premium experience.
Step 2: Pick the Perfect Fragrance
The symphony of scents—selecting fragrance oils for candles is like finding the perfect soundtrack for a memory. As you wade through choices, consider what emotions you want your candle to evoke. Calming lavender for relaxation, invigorating citrus for a morning boost, or perhaps a woody note to set the mood? But, just as with music, quality matters.
Investing in premium fragrance oils for candle-making is highly recommended. If you have aspirations of selling your handmade candles, consider a luxury fragrance oil for candle-making to give your customers an experience they'll cherish. Pssst, if you’re wondering which scents are hot right now, stayed tuned for our Candle-Making Trends 2023 blog.
Step 3: Gather Your Supplies
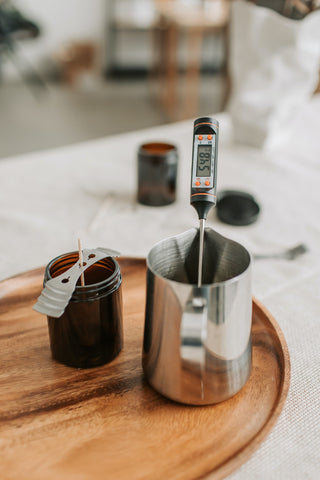
Embarking on your candle-making journey requires more than just enthusiasm; having the right candle-making supplies is fundamental. Beyond the wax and fragrance oils, you’ll need various tools and materials to achieve handmade candle perfection.
From sturdy wicks that promise a consistent burn to vessels that define your candle's personality—if you're serious about this craft and are even contemplating how to make candles at home to sell, wholesale candle-making supplies may be the most economical choice. Aside from wax and fragrance oils, here is the candle-making equipment you’ll need:
- Sturdy wicks
- Candle Vessel
- Thermometer
- Pouring pot
- Stirring utensil
- Wick holder
- Safety equipment (gloves, apron, safety goggles, etc.)
- Scissors
- Dyes or colourants (optional)
- Decorative elements such as a label (optional)
For more in-depth information about the supplies you’ll need, head over to our dedicated page on our website.

Step 4: Melt the Wax
Safety remains paramount while melting the wax. You can use the double boiler method to ensure even heating and avoid any direct contact with flames. Continuously monitor the temperature; for soy wax, the ideal melting point hovers around 85°C (185°F). This ensures the wax maintains its properties and blends seamlessly with your chosen fragrance oils.
Step 5: Mix in the Magic
With your wax in its liquid avatar, it’s time to conjure some olfactory magic. Stir in the fragrance oils for candle-making gently, ensuring the scent permeates throughout the wax. This step defines the soul of your candle—the aroma. Ensuring an even distribution guarantees that each time the candle burns, it releases a consistent, comforting scent.
Step 6: Prepare the Candle Vessel
The vessel you choose will shape your candle's identity. Before pouring in the molten blend, ensure the mould or container is spotless and devoid of moisture. A centred wick ensures even burning, so take the time to position it correctly, securing it with a glue dot to keep it steadfast and using an adjustable wick holder to hold it firmly in position.
Step 7: Pour with Precision
Pouring might seem simple, but it's an art form. Slowly pour your wax and fragrance concoction into the mould, slowly so that no air bubbles form. Always leave about half an inch from the top, allowing the candle to breathe and burn evenly.
Step 8: Let it Set
The anticipation of seeing your creation take form requires patience. Allow your candle to solidify undisturbed for at least 24 hours before popping it to one side to cure (the curing time depends on the wax). This ensures a clean, smooth finish, adding to its aesthetic charm.
Step 9: Trim the Wick
A wick too long can lead to a larger, smoky flame that emits soot and creates a toxic environment. On the other hand, a wick that is too short won’t melt the wax efficiently and the flame is likely to struggle.
Once your candle is set, make sure that you trim the wick to about 5mm (longer if using wood wicks) above its surface. This simple instruction ensures your candle burns cleanly and beautifully, emitting minimal soot and maximising its fragrance release.

Step 10: Illuminate Your Masterpiece
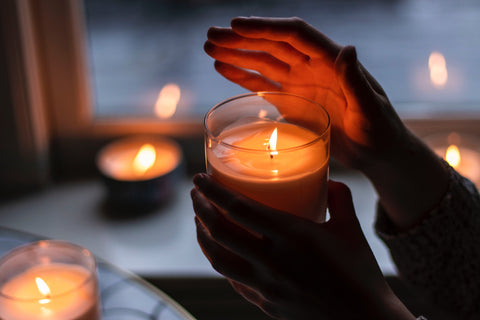
By meticulously following these steps, your handmade candle is no longer a dream—it's a radiant reality. As you light it, take a moment to bask in its glow, and let the fragrance you've chosen envelop you. Each flicker is a testament to your craft and dedication!
NI Candle Supplies is Your Guiding Light
Embarking on your candle-making journey is not just about crafting a mere household object; it's about the whole experience. Each candle reflects a part of you, making it unique and special. And remember, as you explore and perfect this craft, NI Candle Supplies is here, providing you with the best candle-making supplies to ignite your passion.
Ready to craft more luminous wonders? Explore our extensive range of fragrance oils, waxes and candle-making supplies and let your creativity shine.


2 comments
I’m making 60 cl candles with paraffin wax how much of your elderflower and rhubarb and fragrance should I add ? Thanks Dani
———
NI Candle Supplies LTD replied:
Thanks for your comment Dani. We’d suggest using our handy scent load calculator to work out the ratio of fragrance oil needed for your candles, it can be found at the bottom of each of our fragrance oils or at the following link: https://www.nicandlesupplies.co.uk/blogs/how-to-guides/how-to-calculate-fragrance-scent-load
Hi – this is so helpful – I am a real beginner! There’s some further questions I would like to ask:
1 – Do you add the fragrance oil at around 85 degrees celcius?
2 – At what temperature do you pour the mixed solution into the vessel?
3 – Which is the best soy wax? / wha are the differences in the numbers (i.e. 444 etc)
I really appreciate you getting back to me on these x
———
NI Candle Supplies LTD replied:
Thanks for your comment Heather! Please reach out to us via email at support@nicandlesupplies.co.uk so we can chat in more detail about your questions.